Adding captions to graphics
You can add captions to graphics in three ways: automatically, by using the Caption dialog box, or manually.
Adding captions automatically
You can set up OOo to add captions automatically whenever you insert a graphic, a table, or other objects into a document. You can choose which objects are captioned automatically, what the sequence name is for each caption (for example, “Table” or “Illustration”), and the position of the caption.
To set up automatic captions:
- Click Tools > Options > OpenOffice.org Writer. Click on the + sign to open the different options. The Options – OpenOffice.org Writer – AutoCaption dialog box opens.
- Select AutoCaption. Now you can see several choices at the right of the dialog box for adding captions automatically.
- On the AutoCaption dialog box, choose which objects will be automatically captioned and specify the characteristics of the captions.
For more information, see "AutoCaption options” in Chapter 2 (Setting up Writer).
When you insert a graphic, if automatic captioning is enabled, the graphic will be placed in a frame along with a caption containing the default sequence name for graphics―Illustration. Position the cursor in the caption area and type the text for the caption. You can change the sequence name by selecting one from the drop-down Category list.
| You can specify where to place an automatic caption for any object except a picture; picture captions can only be automatically placed below the picture. If you need a caption above the picture (for example, for data plots in scientific publications), you must add the captions manually, as described in Adding captions manually. |
Using the Caption dialog box
To add captions using the Caption dialog box:
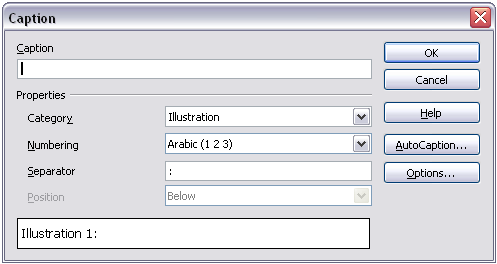
- Insert the graphic, then select it and click Insert > Caption.
- Under Properties on the Caption dialog box, make your selections for the Category, Numbering, and Separator fields (Illustration, Arabic (1 2 3), and a colon (:), respectively, for the example in the figure) and type your caption text in the Caption text box at the top. Whatever text you enter for the caption appears in the box at the bottom, after the sequence name, number, and separator.
- Click OK. The graphic and its caption are placed in a frame, as shown below.

Defining the caption for an illustration
| In the Category box, you can type any name you want, for example, Figure. OOo will create a numbering sequence using that name. |

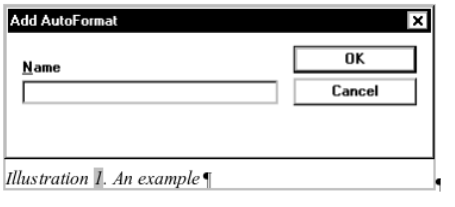
An example of a graphic and its caption contained in a frame. The outer box shows the edge of the frame; this border is normally set to be invisible.
Adding captions manually
You can add a caption to a graphic manually in two ways.
Method 1: Override the category and positioning defaults for captions
- Select the picture, right-click on it, and select Caption.
- On the Caption dialog box, select <None> in the Category list and click OK.
- Right-click on the picture and select Caption. Now you can select a caption type (or type your own sequence category) in the Category drop-down list and, optionally, select Above in the Position list. (If you want the caption to appear at the top, you must add the caption manually.) You can type the actual caption in the box under Caption or you can fill it in later—after the (incomplete) caption is inserted.
- Click OK.
Method 2: Place the graphic and its caption in separate paragraphs
- Insert the graphic and anchor it to its paragraph as a character. Press Enter to create a new paragraph for the caption.
- In the caption paragraph, type, for example, Figure and add a space.
- To insert the figure number, click Insert > Fields > Other and select the Variables tab.
- Select Number range in the Type list. Select Figure in the Selection list and choose, for example, Arabic (1 2 3) in the Format drop-down list. Click the Insert button.
- A number will appear after the word “Figure” in the caption. Now, type the text of the caption.
| Content on this page is licensed under the Creative Common Attribution 3.0 license (CC-BY). |