Example drawing: house plan and furniture
- Positioning objects with Zoom
- Positioning objects with snap functions
- Snap to grid
- Snap to snap objects
- Other snap functions
- Positioning objects with helper lines
- Drawing to scale
- Splitting complex drawings on multiple layers
- Example: house plan and furniture
- Multi-page document
- Using page backgrounds
- Color palette
- Using the color picker dialog
- Cool effects
A popular application for programs like Draw is the “moving the furniture” scenario. The floor plan of a room or a house is easily drawn with Draw. The simplest way is to draw walls as thick lines. You can also draw single rectangles or polygons, place them together, select them and then from the right-click menu use Shapes > Merge to make a single figure, then add a hatching pattern. Before you do this, you should read the section Drawing to scale.
For this example a suitable measurement unit is centimeter. The drawing scale and grid settings will depend on the size of the floorplan.
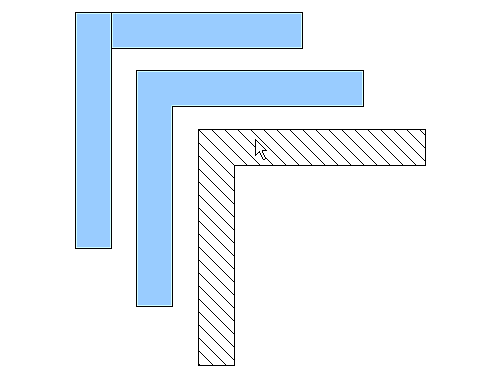
With the field Position and Size you can very easily position and dimension the individual wall sections. Watch out that the rectangles completely overlap (see Figure 18) otherwise the merging will give uneven edges.

Figure 18: Wall corner from two rectangles. From upper to lower: before merging, after merging and after hatching.
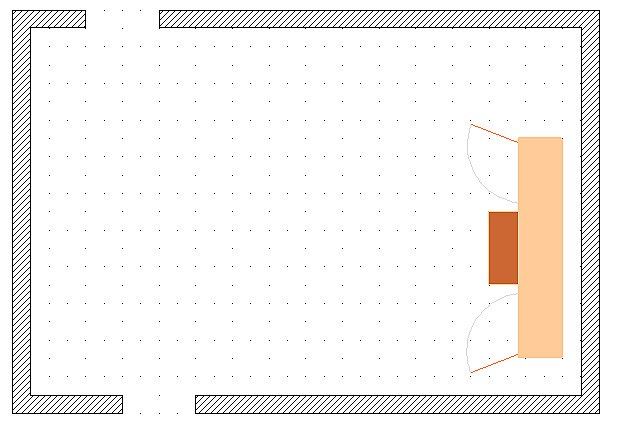
Figure 19 shows the finished floor plan. In addition a chest of drawers has been added. The body of the chest would be drawn on the Layout layer, the pulled out drawers and the open doors drawn as a group and put on a separate user defined layer.

Figure 19: Floor plan with chest of drawers.
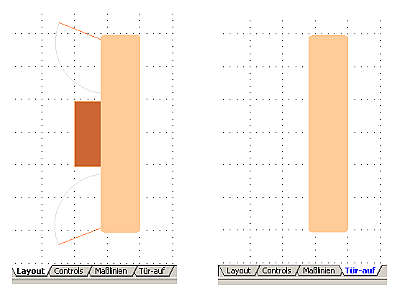
Making this latter layer visible or hidden will show the doors and drawers open and closed. Hidden layers are shown with a colored tab (see Figure 20).

Figure 20: Making layers visible or hidden.
Changing the layer of a drawing object
Draw has no direct command to change layers. If an object is to be moved to another layer, simply change to the new layer, select the desired object or group, and then cut and paste it in position. If you watch the status bar (here the information field) you can easily follow and check the change in layer. You can also click on the object, hold the mouse button pressed for about two seconds to copy the object to the Clipboard and then paste it on the appropriate layer.
| Content on this page is licensed under the Creative Common Attribution 3.0 license (CC-BY). |