Choosing options that affect all of OOo
Contents
OpenOffice.org options
This section covers some of the settings that apply to all the components of OpenOffice.org. Other general options are discussed in Chapter 2 (Setting up OpenOffice.org) in the Getting Started guide.
- Click Tools > Options. The list on the left-hand side varies depending on which component of OOo is open. The illustrations in this chapter show the list as it appears when when OpenOffice.org Impress is open.
- Click the + sign to the left of OpenOffice.org on the left-hand side. A list of subsections drops down.
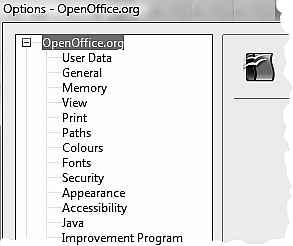
OpenOffice.org Options.

| The Back button has the same effect on all pages of the Options dialog. It resets the options to the values that were in place when you opened OpenOffice.org. |
User Data options
Impress uses the first and last name stored in the User Data page to fill in the Created and Modified fields in the document properties, and the optional Author field often used in the footer of a presentation, so you will want to ensure that your name appears there. To do this:
- In the Options dialog, click OpenOffice.org > User Data.
- Fill in the form on the OpenOffice.org – User Data page or delete any existing incorrect information.
Print options
Set the print options to suit your default printer and your most common printing method. You can change these settings at any time, either through this dialog or during the printing process (by clicking the Options button on the Print dialog).
In the Options dialog, click OpenOffice.org > Print.
See Chapter 10 (Printing, e-mailing, exporting, and saving slide shows) for more about the options on this page.
Color options
On the OpenOffice.org – Colors page, you can specify colors to use in OOo documents. You can select a color from a color table, edit an existing color, and define new colors. These colors are stored in your color palette and are then available in all components of OOo.

To modify a color:
- Select the color to modify from the list or the color table.
- Enter the new values that define the color. If necessary, change the settings from RGB (Red, Green, Blue) to CMYK (Cyan, Magenta, Yellow, Black) or vice versa. The changed color appears in the lower of the two color preview boxes at the top.
- Modify the Name as required.
- Click the Modify button. The newly defined color is now listed in the Color table.
Alternatively, click the Edit button to open the Color dialog, shown below. Here you can select a color from one of the color windows in the upper area, or you can enter values in the lower area using your choice of RGB, CMYK, or HSB (Hue, Saturation and Brightness) values.
The upper right color window is linked directly with the color input fields in the lower area; as you choose a color in the upper window, the numbers change accordingly. The two color fields at the lower right show the value of the selected color on the left and the currently set value from the color value fields on the right.
Modify the color components as required and click OK to exit the dialog. The newly defined color now appears in the lower of the color preview boxes shown in the figure above. Type a name for this color in the Name box, then click the Add button. A small box showing the new color is added to the Color table.

| Another way to define or alter colors is through the Colors page of the Area dialog, where you can also save and load palettes, a feature that is not possible here. However, if you load a palette in one component of OOo, it is only active in that component; the other components keep their own palettes. In Impress, open the dialog directly using Format > Area. |
Appearance options
On the OpenOffice.org – Appearance page, you can specify which items are visible and the colors used to display various items.
- In the Options dialog, click OpenOffice.org > Appearance.
- The only choice specific to Impress (and Draw) is the color of the grid points. Scroll down in the page until you find Drawing / Presentation.
To change the default color for grid points, click the down-arrow by the color and select a new color from the pop-up box. - If you wish to save your color changes as a color scheme, click Save, type a name in the Scheme box; then click OK.
-

Changing the color of grid points in Impress and Draw.

| Content on this page is licensed under the Creative Common Attribution 3.0 license (CC-BY). |