Customizing a table of contents - DRAFT
From Apache OpenOffice Wiki
- Tables of contents
- Customizing a table of contents
- Using the Index/Table page
- Using the Entries page
- Using the Styles, Columns, and Background pages
- Maintaining a table of contents
- Alphabetic indexes
- Customizing index entries
- Customizing the appearance of an index
- Maintaining an index
- Other types of indexes
- Bibliographies
- Creating a bibliographic database
- Adding a reference (citation) into a document
- Formatting the bibliography
- Defining the paragraph style for the bibliography
- Updating and editing an existing bibliography
Customizing a table of contents
To insert a customized table of contents into your document:
- Place the cursor where you want the table of contents to appear.
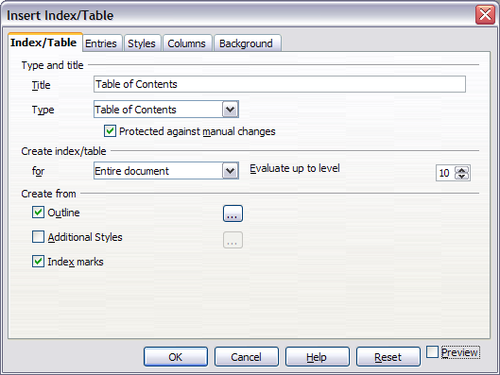
- From the main menu, choose Insert > Indexes and Tables > Indexes and Tables. The Insert Index/Table dialog box opens.
This dialog box has five pages. Any or all of them can be used when creating or editing a table of contents:
- Use the Index/Table page to set the attributes of the table of contents.
- Use the Entries and Styles pages to format the entries in the table of contents.
- Use the Columns page to put the table of contents into more than one column.
- Use the Background page to add color or a graphic to the background of the table of contents.
You can display a preview box, located on the left-hand side of each tab, to show as you work how the table of contents will look. (If you do not see the preview box, select Preview in the lower right-hand corner of the dialog box.) The illustrations in this chapter show the dialog box as it appears with the preview box hidden.
After making all your changes, click OK to save the table of contents so it appears in your document.
| Content on this page is licensed under the Creative Common Attribution 3.0 license (CC-BY). |
