Documentation/OOoAuthors User Manual/Writer Guide/Creating a form letter
From Apache OpenOffice Wiki
| [[{{{PrevPage}}}|< Previous Page
]] |
[[{{{NextPage}}}|Next Page
>]] |
Creating a form letter
Example: Sending a letter to your customer base
A mail order company organized a campaign to assign credit points to their customers according to the quantity of goods they buy during one year. At the end of the year, they want to send a letter to each customer to show the total of credit points collected.
You can use the Mail Merge wizard to create a form letter, or you can create the letter manually. See Using the Mail Merge Wizard to create a form letter for instructions on using the Wizard.
This section describes how to create a form letter manually.
- Create a new text document: File > New > Text Document.
- Display the registered data sources: View > Data sources (or press F4).
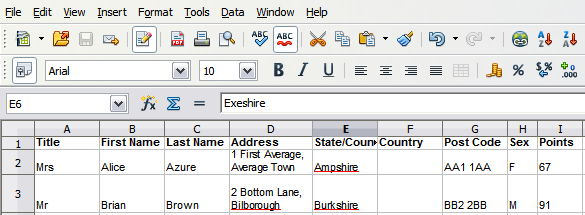
- Find the data source that you wish to use for the form letter, in this case Points. Expand the Points folder, expand the Tables folder, and select Sheet1. The data file is displayed.
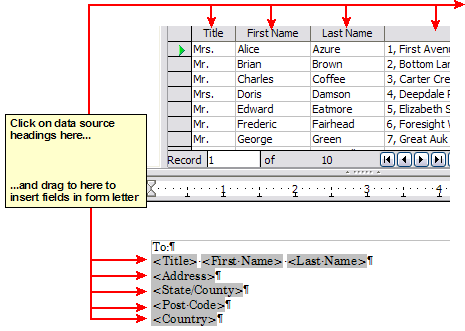
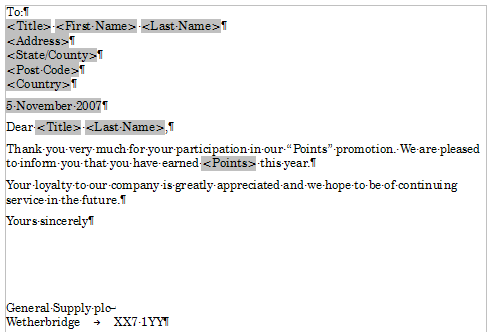
- Now create the form letter by typing in text, punctuation, line breaks, and so on that will be present in all of the letters, and adding fields where needed by clicking in the field heading and dragging to the appropriate point in the letter.
- Continue until you have composed the entire document. (See below for an example.)
- The document is now ready to be printed. Click File > Print.
- The following dialog appears. Answer Yes. Do not select the checkbox.
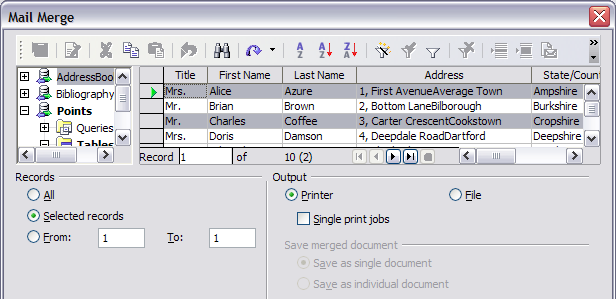
- In the Mail Merge dialog, you can choose to print all records or selected records. To select records to be printed, use Ctrl+click to select non-contiguous records. To select a contiguous block of records, select the first record in the block, scroll to the last record in the block, and Shift+click on the last record.
- Click OK to send the letters direct to the printer. If you wish to check the letters before printing, see Saving as a file rather than printing for instructions.

Dragging fields to the body of the form letter.
| Content on this page is licensed under the Creative Common Attribution 3.0 license (CC-BY). |


